History and context of this patch of ground
This patch of ground is located in the northwestern corner of the yard, along a south-facing brick wall. Because of it’s orientation, it gets a good amount of direct sunlight every day. And the brick wall absorbs heat from the sun, keeping this area a little warmer than the surroundings. Thus, it would seem like a great place to grow heat-loving and sun-loving crops…except for the soil quality.
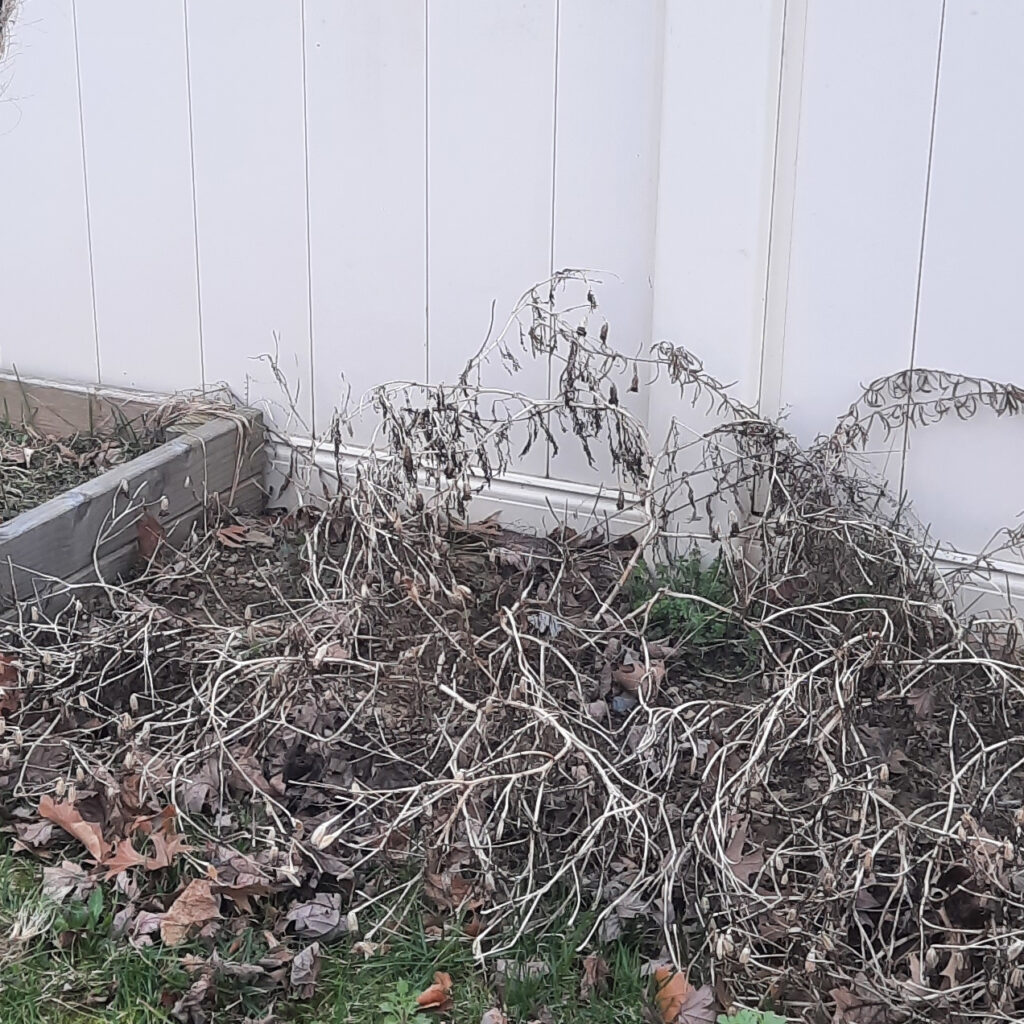
Before starting this project, the ground was covered with tarp and gravel. Here’s what it looked like:
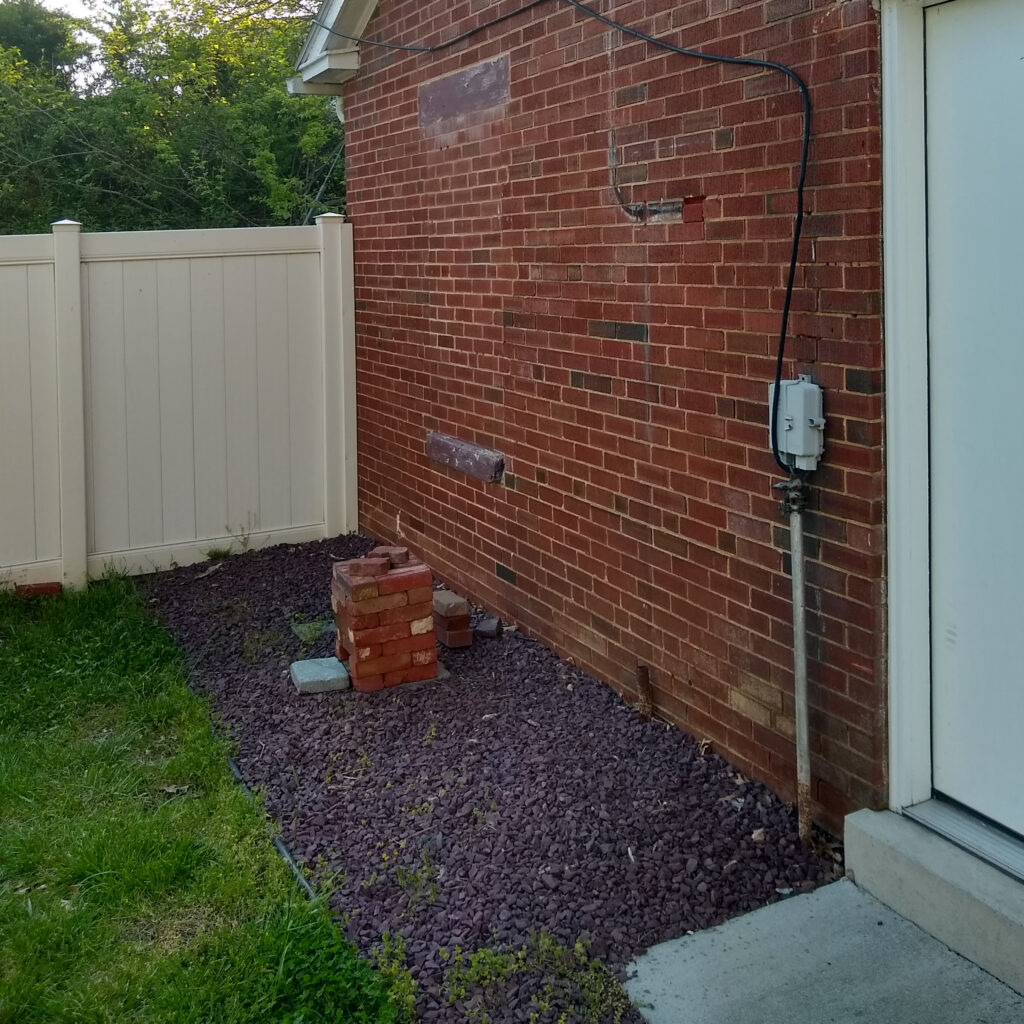
Apparently, a previous property owner covered large patches of the ground with plastic tarp and then put gravel on top of the tarp. Aside from a few scrappy weeds that can grow among the gravel, this method seems pretty effective at stopping plants from growing in the covered areas. This is because plants aren’t able to grow through the tarp (either up from below to reach sunlight or down from above to reach the soil).
As a result, the soil underneath has remained bare, devoid of any visible plant life. We know this because we’ve been uncovering parts of the graveled areas (more on that below).
First planting season: moderate success
About a year ago, for the first time in who knows how long, we removed some of the gravel and tarp to make a garden bed and plant tomatoes. The tomatoes did OK, but not as well as the tomatoes that were planted in another part of the garden the year before.
One main difference between the two tomato planting areas was the quality of soil. Whereas the soil with abundant tomatoes had been prepared using the hugelkultur technique, the soil in the recently uncovered patch was bare and compacted. We chose not to dig or cultivate the recently uncovered patch because of the possibility of buried electrical lines.
So the challenge: how to build rich, fertile soil without digging? Challenge accepted!
Second season challenge: build soil fertility
The cover cropping plan
This spring (2022), our new garden bed was still looking pretty bare, except for a few weeds. Thinking, “How can I build up the organic matter?,” I got inspired to test out a cover crop seed mix I bought in 2020, at the start of the pandemic.
In a nutshell (pun intended), the plan is to grow this mix of peas and oats for some time and then chop them down to create mulch. As the mulch breaks down, it will become part of the soil, increasing soil organic content. And while it’s breaking down, it will keep the soil covered, slowing moisture loss. That’s the plan, anyway.
The recommended planting depth on the seed packet was 1–3 inches (2.5–7.5 cm). So I figured I would carefully loosen and break up the top inch or two of soil with a garden hoe. That way, I could easily feel and avoid any buried electrical wires that might be there.
And the weather forecast showed rain for the next several days, so it was the perfect time to sow some seeds. Excitedly, I got to work!
An unexpected surprise
But when I started scraping the top of the soil, I was met with an unexpected surprise: earthworms! They were burrowing in the soil. And by scraping the soil with the sharp, metal edge of the hoe, I was actually cutting the earthworms up!
I stopped immediately. I could feel in my own body the pain I was causing to the worms! There had to be a better way.
I was already aware of some of the ecological and agronomic benefits of no-till farming. Now I had another, very visceral reason to explore no-till.
Strategy shift: using mulch to bury seeds and feed worms
After discovering the earthworms, I decided to adapt my soil building strategy to include them in the mix.
After all, earthworms are a gardener’s best friend. They accelerate the composting process, digesting and excreting dead plant matter, which increases the nutrients available to plants in the soil. They dig burrows, which allow water to go deeper into compacted soils. In a sense, they feed and till the soil. (I’ll share more about the science of earthworms in another article.)
I still wanted to sow the cover crop seeds, though. And they still needed to planted at least 1 inch (2.5 cm) deep. So how could I do this without disturbing the soil and the earthworms?
I remembered a post I had read, on the Permies forums I think. The post described sowing seeds on the surface of the soil and then mulching over top of the seeds, in essence burying the seeds with mulch. Not only would this mulch provide protection and growing medium for the seeds, but it would also feed the worms. A two-for-one deal!
But where would I get mulch?
Looking around the yard, I saw little piles of dead leaves and plants left over from last year. So I got to work making mulch out of these.
I prepared the mulch by gathering the dead leaves and plants into little piles and then running them over with a lawnmower. This chopped them up into small pieces and collected them into the mower bag.
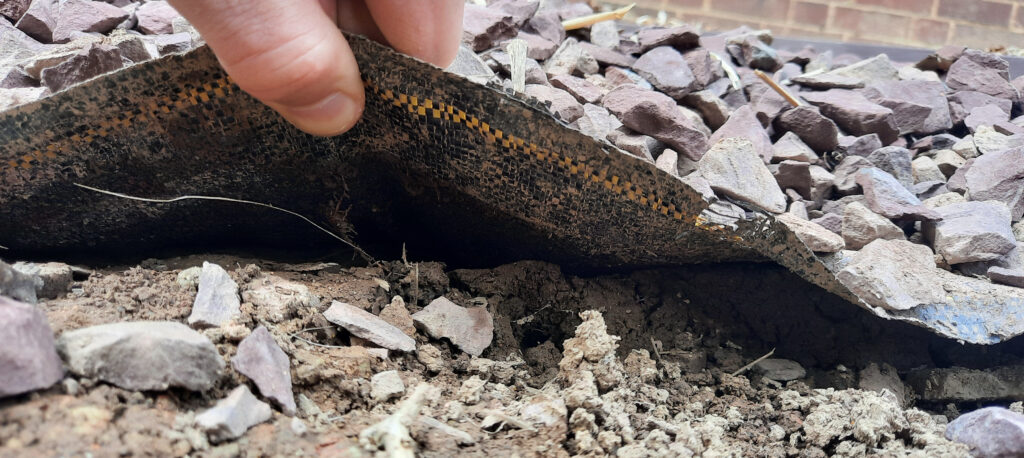
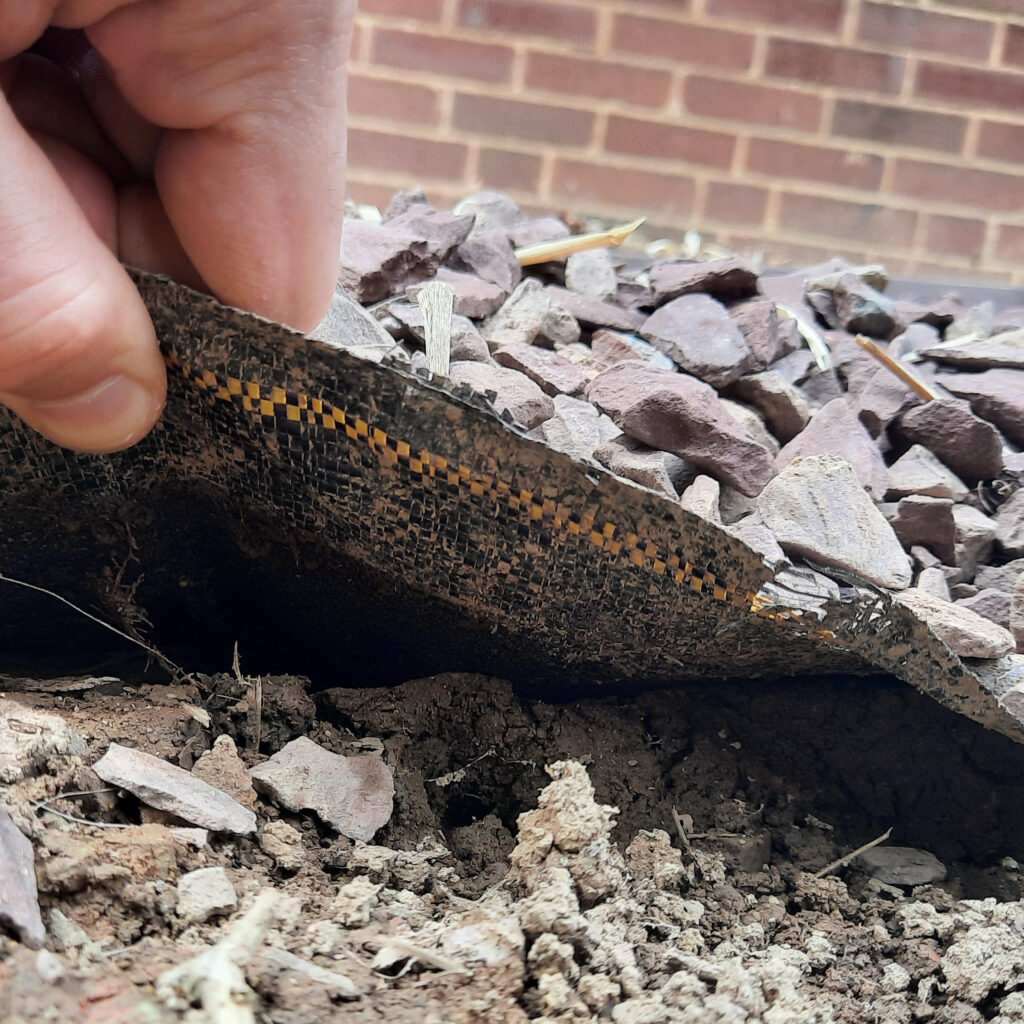
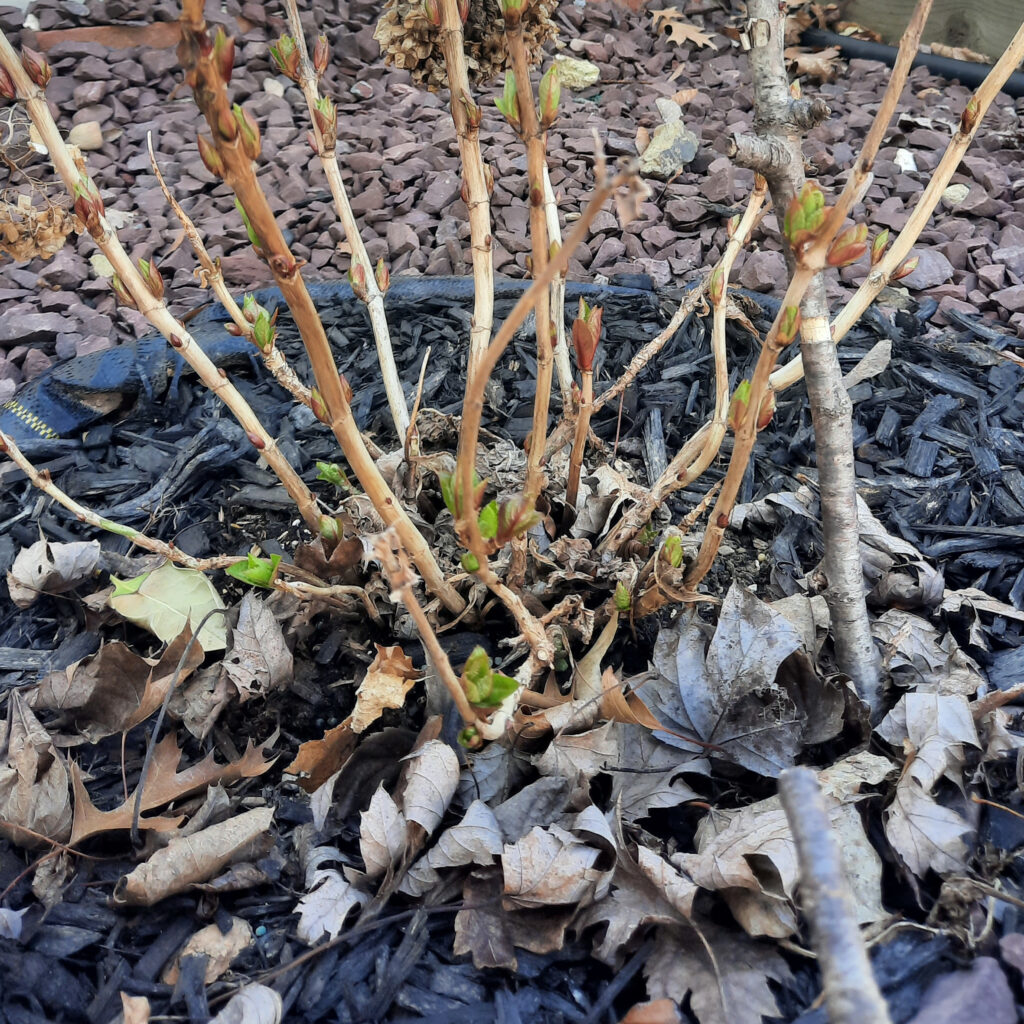
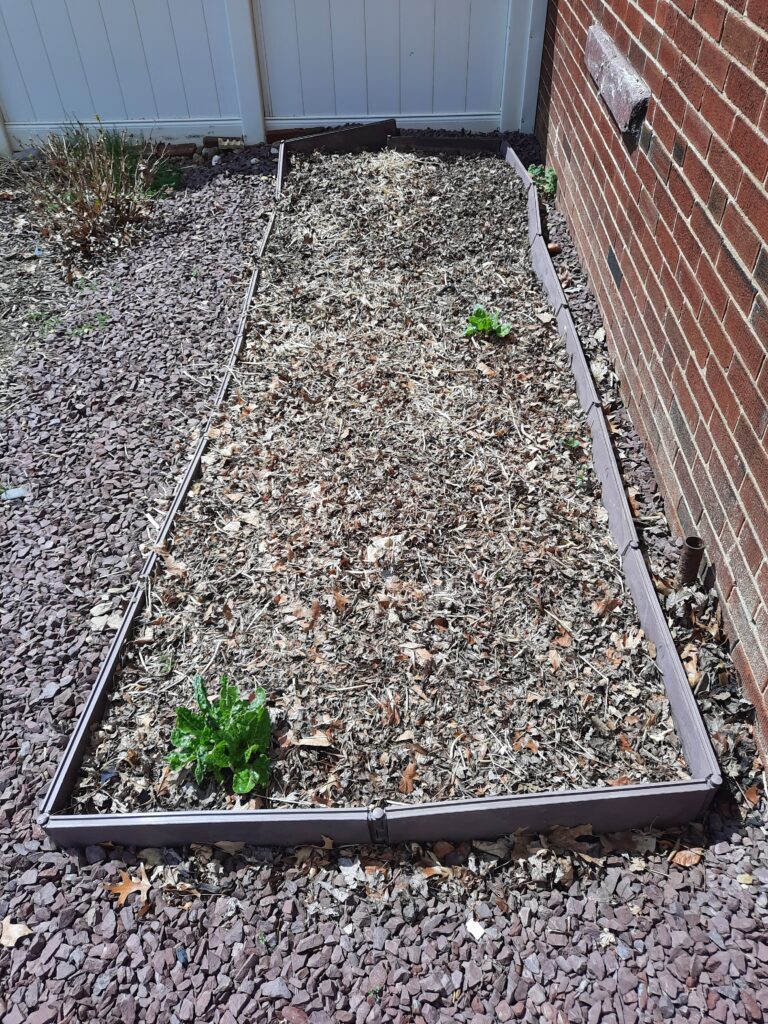
So after getting the mulch ready, I sowed the peas and oats directly onto the surface of the soil. And then I covered the soil surface with about an inch of the mulch that I’d just prepared. Here’s what the bed looks like now:
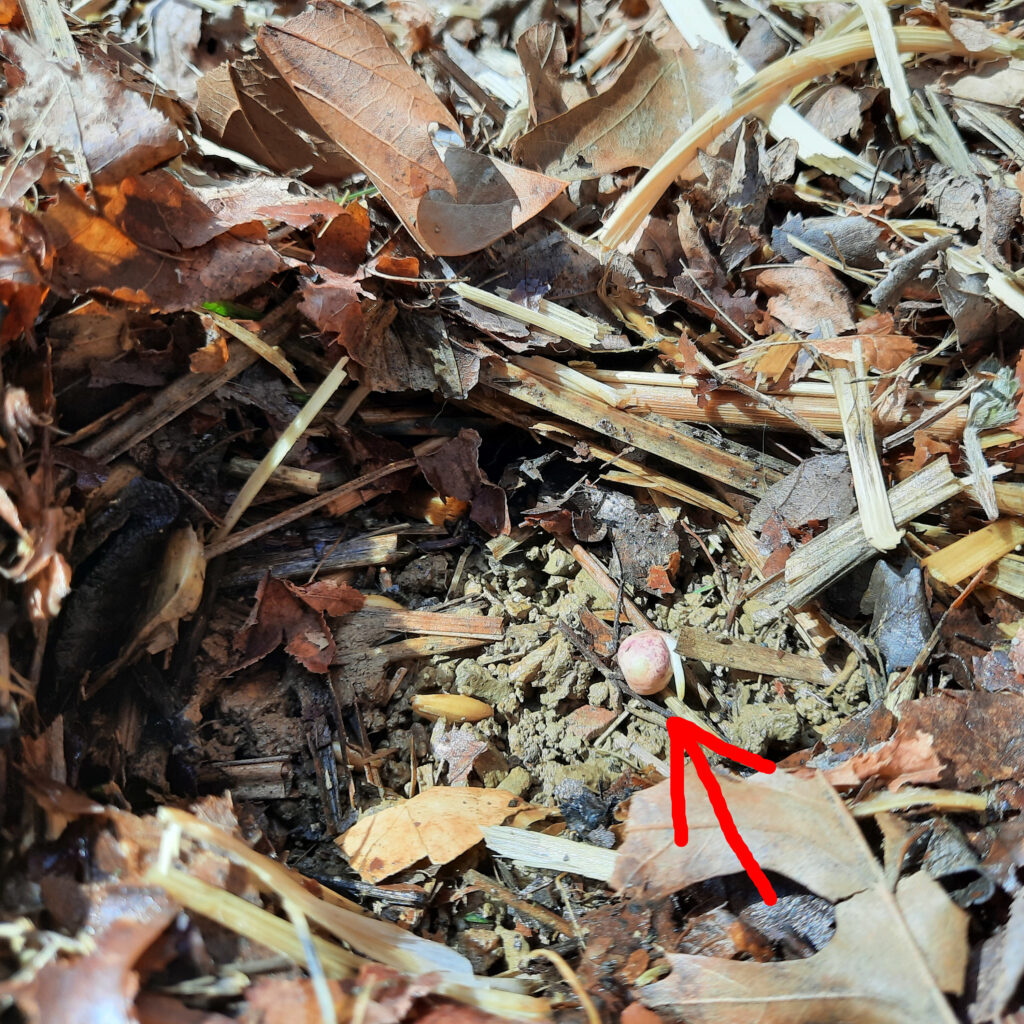
And in less than a week, some of the seeds already started sprouting! Here’s a little peek underneath the mulch:
Looking back, looking ahead
As a scientist, I love that agriculture provides endless opportunities to observe, interact with, and learn about the natural world. Uncle Jerry Konanui, a Hawai’ian taro farmer, expressed this sentiment so well:
“A lot of people look down on us as mahi’ai, as farmers. ‘He’s only a farmer.’ They fail to realize that to be a good mahi’ai yeah, you have to know the universe of a mahi’ai, which means I have to be a water scientist. I have to be a soil scientist. I have to be a weatherman to be able sense the wind, the rain. The whole environment is my universe.”
Uncle Jerry Konanui (from this video)
Through this project in the garden, I am learning how to build soil fertility when tilling is not a viable option–in my case, due to the potential for buried electrical lines and the desire to care for the worms.
I am learning how to make plans and adjust them as I discover new things–like worms already in the soil.
And I am learning how to make use of what I already have–a lawnmower and dried up plant matter (just waiting to be mulched).
In the weeks ahead, I’ll be sharing more about this and other gardening projects projects, including a look at the science of earthworms. So stay tuned! 🙂
What do you think? Did you learn something new? Something to share? I’d love to hear from you in the comments below!
G’Day Dr. Earthy Morcol!
For real…Dr. Earthy! Plum Village surely offered you the perfect Dharma name!!! I appreciate your soil-on-bare-ground study case. AWESOME!!! I love those Earthy-worms too!
I have never heard of hugelkultur before and I love IT! Wish there was some way we could bury our Lightning hit-Spirit tree that blew over in the wind last autumn! We dwell on a mountain of boulders! For fire mitigation purposes we will be chopping the Spirit Tree into firewood for our neighbor Dennis. It looks like we will be working with fresh tree mulch and mycelium spores for moisture retention and nutrients in the community gardens and here on the mountain though.
I attended a high altitude community gardening ‘class’ at the Nederland Library this past week. Ned is quite a cool community, mostly organized by fabulous womyn, in that the community grows food at the Nederland Food Pantry, as well as in the community garden, and gives away the organic fresh produce to low income folks in the community! Social Action AND working with the green leafy lovelies! Kendra, the Community Garden and Food Pantry Manager sent me this helpful site: https://extension.colostate.edu/. I think you will appreciate the content. And they are offering free webinars too: https://csuhort.blogspot.com/p/csu-extension-spring-gardening-webinars.html?m=1
It is snowing today (4/17/22) and because our growing season is incredibly short, as well as the temperatures vary greatly from night to day, I have started seedlings indoors by the passive solar heat-windows!!! The little green plant-people are popping above the soil…just this week!!!! Yippie!!! My seed saving techniques are working. I planted half saved seeds from last autumn’s veggies and half from organic seed packets, and so far they are all ‘coming alive’!
Wild Bear Nature Center will be hosting a high altitude gardening event tomorrow (Monday) and I will attend this too. https://www.wildbear.org/.
Thank you, Dr. Morcol for sharing your scientific discoveries and experiments. I find it all so fascinating!
Wild Be,
Lisamarie Windwalker
G’Day Lisamarie!
Are you all considering using fungal spore infused oil on the wood chipper blades? I’ve heard this is a great way to inoculate freshly cut wood with the species of fungi that you want.
Thanks for sharing the links! The Co-Horts look like they have some interesting programs. And agricultural extension services are a great resource. I’ve been using the PSU Extension’s website here in PA.
Oh nice, I started some seedlings too! They’re pretty leggy, though. I think they need more light. I’ve had close to 100% germination rates, even with 2-year-old seeds. The way I store them (triple bagged in the fridge and using rice as a desiccant) seems to be working.
Glad to hear the article was fun and useful for you.
Taylan
G’Day Dr. Morcol!
HA! We have not gotten as far as how we are going to clear the land of dead tree parts yet…life has been incredibly full as of late.
Where using fungal spore-infused oil on the chipper blades is a great idea, the trees that were blown over in the wind have been dead for many years and most likely already have a host of microbes and mycelium living in them. We do however, have a couple of logs that we inoculated with blue dolphin spores when they were freshly cut down in Boulder. I brought them up to the deck to see if they will fruit again, as the critters on the land may have devoured them last spring. ;o)
Regarding the the indoor green leafy lovelies (seedlings), all have popped through the soil now and are growing fast, I may need to re-pot them in a few weeks, as I will most likely not be able to get them outside until June. I also wanted to know if you would like me to send some of my saved heirloom tomato and Russian pepper seeds and some of the melon seeds? It would be really cool to see how these seeds/plants grow in fertile low altitude ground. Wanna create an experiment?
I asked a question of a 20 year veteran gardener at the Wild Bear presentation on high altitude gardening on Monday; “Being a gardener at 9,400ft for 20 years, what changes in climate have you noticed?” He said that the climate here on the mountain is becoming increasingly and alarmingly dryer. That there used to be summer monsoon rains that no longer exist. Growing food has become increasingly more difficult.
Gardening at this altitude has one benefit though….almost no pests to ruin crops. Root vegetables do best here with the short season and the huge shifts in temperature from night to day. I intend to experiment with planting potatoes and root veggies in the raised-fort-beds this year. Forts because there are Moose, Deer, Elk, ground squirrels, voles and moles that devour everything in sight. ;o))) I would like to mulch these beds with fresh wood chips and cardboard infused mycelium. Who knows perhaps some tasty mushrooms will accompany the potatoes? We live on a well in a municipality and we are not supposed to water the land with the well water and this includes gardens. I am considering finding a few rain barrels.
Well that’s all the banter for now. Thank you for the chipper suggestion…it has got my wheels turning…perhaps it would be good to rent a chipper for some of the dead wood and mulch some of the barren areas on this land.
Wild Blessings,
Lumi/Lisamarie Windwalker
Thank you for sharing your experience with the soil. That is quite the challenge when you have worms right there on the surface! I always wondered how to create nourishing soil out of the good old leaves from winter and few other ingredients!
You’re welcome Celeste! I definitely enjoy the challenge. It’s fun AND good for the world. Great to hear from you.
[…] be the first to admit that I’m a little obsessed when it comes to building soil. Healthy, fertile soil is the basis for abundance in the garden. With good soil comes good […]
[…] I mentioned in a previous article, earthworms are great for the garden. And I’ve been incorporating them into my soil building […]